
Copyright Urbanrock
I have been wearing La Sportivas for over 7 years now. Starting with the Katana velcros and progressing through Miura Vs, Pythons and finally finding my perfect shoe with the La Sportiva Solution.
For me the Solutions are perfect, the heel is excellent, the toe rand amazing and the ability to use the shoes on tiny edges, little pockets or steep rock and on every rock type meant I was never found wanting for anything else.
When the La Sportiva Futura came out, I was very tempted to get them – when testing I was very impressed, but still loved the heel on the Solution more. The downside to the Solution is the “wearing-in” time. For me at least, they are almost at their best when nearly going through – rounded and smooth.

This made me think about the No-Edge concept. Essentially La Sportiva came up with this new shoe technology so that your toe is closer to the rock. The illustration below highlights this nicely.

Copyright La Sportiva
La Sportiva say “the No-Edge concept brings your foot closer to the rock for better edging performance, increased sensitivity and more homogeneous wear”. They go on to say that you can wear them straight out of the box on your latest projects rather than having to stretch them out & wear down the edges/rubber before you can really feel what is going on.
It all sounded rather tempting. Alongside this, the world’s leading sport climber, Adam Ondra, was wearing them on every type of rock and every ascent. From his tour of UK Gritstone to his 9a onsight of Il Domani, so they kept appearing on my computer screen shouting out to be tried.

And so it began. I needed the La Sportiva Speedster in my life. They would be a great indoor slipper and a nice shoe for steady onsights and warm-up routes, and I thought I would wear the Solutions for the heel and for confidence on the harder stuff.
How wrong was I! I couldn’t put the Speedsters down. My first time wearing the shoe was on the Breathing Method, 8a on Portland. This climb relies on good conditions and my beta uses a knee bar on a small edge. I love the Solutions on this route, but I thought why not try the Speedsters. Straight out of the box I used them and I was impressed. The ability to feel what is going on immediately was bizarre. I felt that I shouldn’t be able to trust a shoe this early on, but I was and the shoe performed brilliantly. From indoors to out I have pretty much used the Speedsters exclusively and left the Solutions in my climbing bag.
So far I only have two small issues. One, my own fault and the second a slight adjustment in the future perhaps?
Firstly, sizing – I am a size 41 in all La Sportiva Shoes. Out of the box the Speedster felt like the right size, it was very tight and hard to get on, but a month down the line and the shoe slips on easily and I think it will stretch slightly more. Next time I’ll drop to a 40.5 I think. I was initially worried about the heel slipping. It doesn’t. I have cranked on it, on various routes and it just sticks.
My only small gripe is I think there could be more rubber on the toe rand. When toe hooking aretes I am still expecting the slightly thicker Solution rubber which proves to be less painful and more grippy. The speedster has less rubber and is slightly thinner.

That said, I am completely sold by the La Sportiva Speedster and No-Edge Technology and can comprehensively confirm that La Sportiva’s quote is true. Straight out of the box it brings you closer to the rock. As a result of this, they suggest the shoe will last longer. There will be no scrapes, bounces or adjustments as you can feel where your toe is in relation to the rock. There is no need for minute heel bounces to get feedback from your senses. You feel your toe drive onto the rock – and for me, that confidence is all you need in a shoe.
If you like La Sportiva shoes and the way they fit but have been a little dubious about the No-Edge concept – whether it will be slippery, whether they will wear out too quickly – don’t be. I strongly recommend you at least trying a pair on at your local climbing shop or at a La Sportiva demo evening. You will not be dissappointed.
No-Edge technology is also available on the La Sportiva Futura and the new Genius (to be released in 2015!).

Copyright Urbanrock
——————————————————————————————————————–

The Theraband Flexbar is an a highly useful tool when combating elbow tendonitis.
Broomstick/Bar/Thera-Band Wrist Curls, Forwards & Backwards
(More for tennis elbow, but you can do for all elbow issues. It is also a good antagonist strength and conditioning exercise)
 (c) Nina Leonfellner 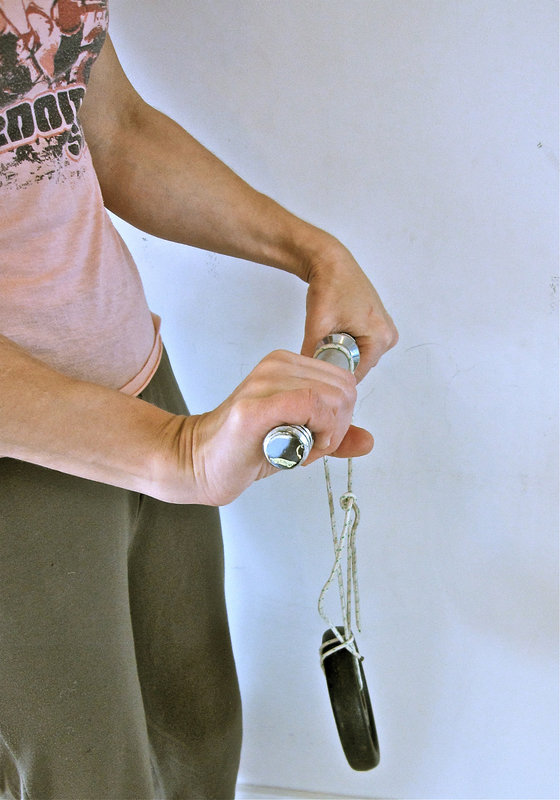 Broomstick Extension
UKC Articles, Feb 2014 © Nina Leonfellner |
What to do:
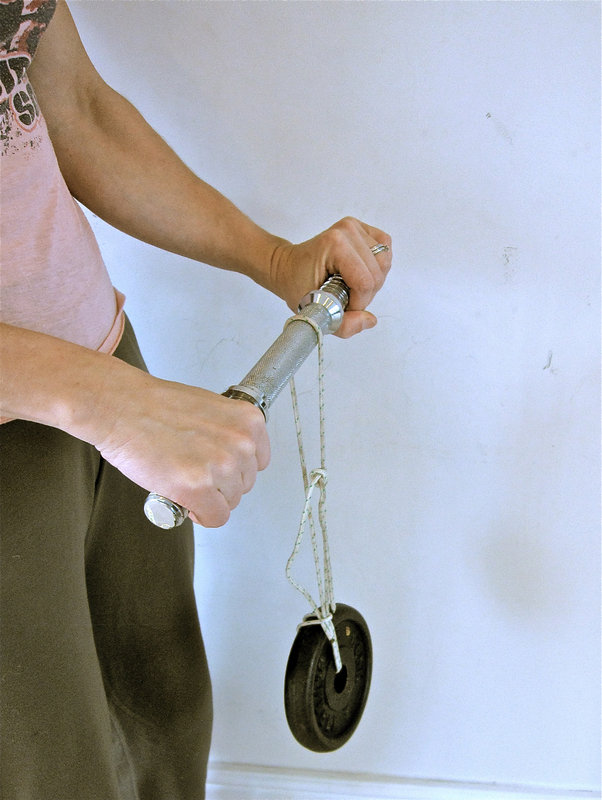
Get a broomstick or a weighted bar, preferably something narrow to grip. Hang a weight or some climbing gear in the middle of the bar with some cord/rope (1-2kg to start then add on so that you get a pump after 20-30 sec of curling). The two actions involve the hands with palms down and starting with elbows next to you(clamped to your sides), later on you can stretch arms forwards to make it a bit harder on your shoulders and elbows. The two actions are:
1. grip the bar and lift your wrist upwards whilst rotating, then the same with the other wrist and continue rotating your wrists upwards alternating sides for 10-15 sec building up to 30 sec.
2. same grip and position but this time rotate your hand and wrist forwards/downwards, as to stretch the top of your wrist/forearms, but in tension. If this position gives you more than a 3/10 pain OR it feels too strenuous wait a few weeks of doing the other exercises first and then add it in later.
 Thera-bar Rotation 1 UKC Articles, Feb 2014 © Bonita Norris
Do 10 sec 10x, then 15sec x8, then 20 sec x5, then 30 sec 3-5 x both ways. Make sure you have enough weight to feel a pump in forearms, but no pain at the elbow that is above 2-3/10.
 Thera-bar Rotation 2 UKC Articles, Feb 2014 © Bonita Norris
The Thera-Band Flexbar has been designed to do the above curls under tension (like the weight). If you are looking to “rev” the bar or lift the wrist, start with both arms in front and the bar in a vertical position. The “revving” hand should be on the bottom of the bar and the stationary hand on top of the bar. The bottom hand should be in the locked position (wrist straight and thumb pointing up) and the stationary hand should be twisting so that your fingers are pointing towards your body with your thumb pointing down. The amount you twist the hands dictates the amount of tension on the bar. Grip the bar and then turn the bar so that it is horizontal.
 Thera-bar Rotation 2 – Side view UKC Articles, Feb 2014 © Bonita Norris
In this position, the bar can be used to either lift your right wrist, or twist down your left wrist. To turn your wrist down works golfer’s elbow (your inside elbow) and to lift up works tennis elbow (outside elbow). The next two photos highlight the two positions.
To work the opposite positions for your arm, start in the opposite position – left hand on the bottom and right hand on top, twist both accordingly to your injury (less if chronic).
In the video below, Robin O’Leary demonstrates the use of a Thera-band Flexbar for helping to treat elbow tendonitis:
For the full article on elbow tendonitis, please visit
——————————————————————————————————————–

Video analysis is an important and developing aspect of coaching. It not only gives the coach a second chance to watch over a certain performance, but it also allows the coach to discuss the performance with their client.
Neil Gresham was the first climbing coach to offer this service in the UK. He also stresses the importance of this on the MCA course. Offering your client a chance to see their performance allows them to really engage with your comments. I have been at the receiving end, and completely appreciated the constructive criticism. As a result, I use video analysis on a daily basis in my coaching. It can be used throughout a coaching session, for different reasons.
For those that are seeking first-time coaching, you can show them how they are climbing instinctively. It’s a very effective way to illustrate technical flaws During this first session, it is then possible to highlight improvement and a transformation in climbing technique. A joy for them to see and something not many coaches are offering today.
For your top end climber, it gives the coach a second chance to view what exactly went wrong. Sometimes the climber pops off for no obvious reason – video analysis allows you to review this and then discuss the reason(s) with your client…lessons learned and something to remember for the next redpoint effort.
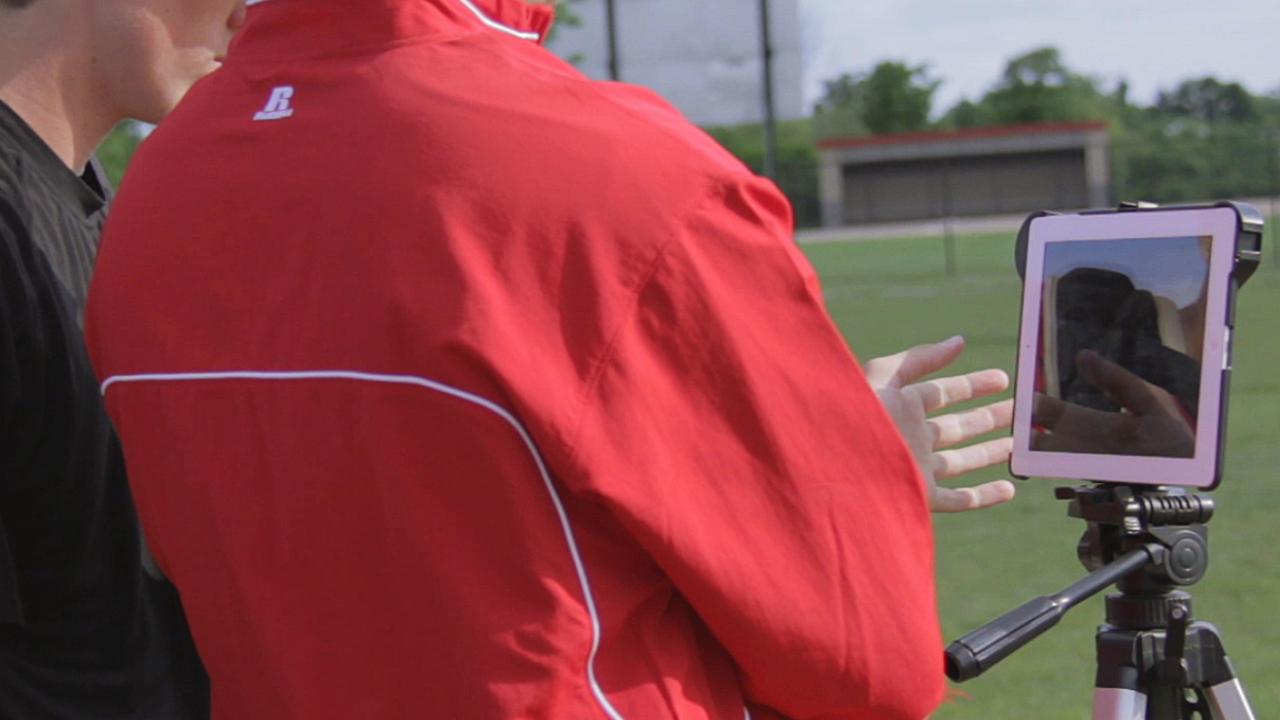
Until recently, I was either using an HD video camera or my phone. If the client was bouldering, traversing or even on a short route, I would use my phone. It is easy to play back and the screen was fairly big. However, if it was on a higher route, I was either forced to ask someone else to film/belay or set the camera up at a distance.
Now I am not sure if you have used a video camera recently, but the screen is very small and if filmed from a distance, catching minute errors proves very difficult indeed. However, Coach’s Eye puts a stop to that!
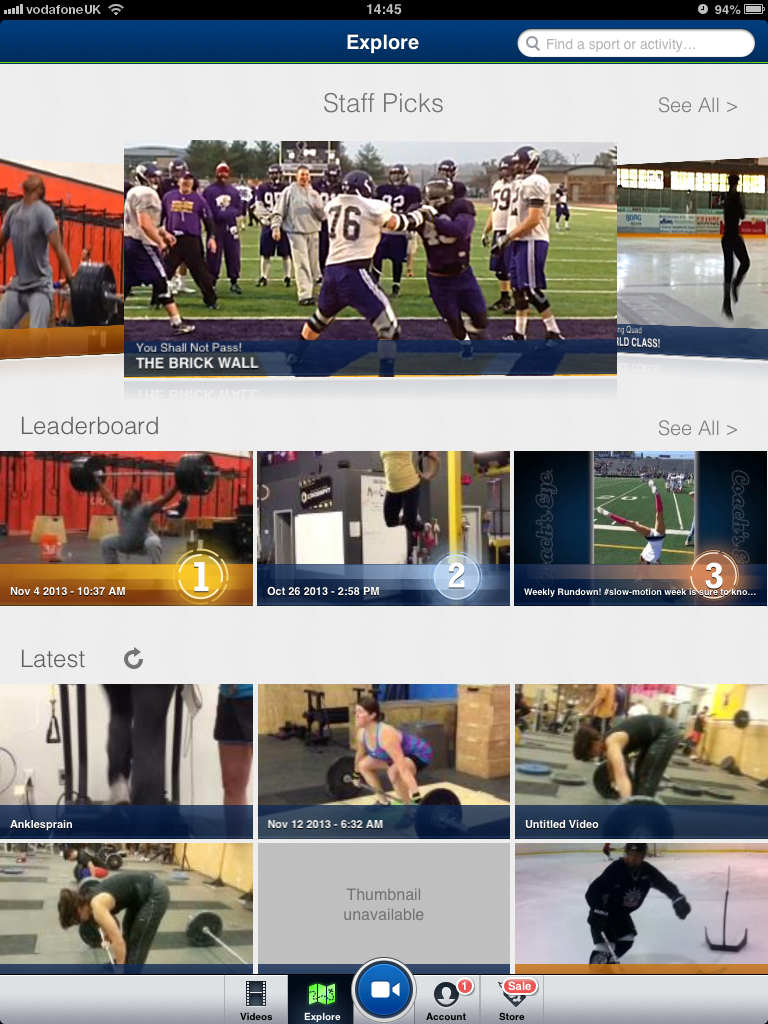
Coach’s Eye is an app made by TechSmith. It can be downloaded from iTunes or Google Play for £2.99. Having used this on a few platforms now, I would recommend the mini iPad the most.
Now it still has the limitations of needing someone to hold the tablet, but otherwise it is hard to criticize. The most obvious benefit of this app on an iPad is that it allows the user to view the footage on a much larger screen – pinpointing with ease the flaws in the performance. This can be enhanced further with the use of Apple TV – for group viewings or coaching symposiums. However, the app becomes really beneficial once you delve deeper into the user options.
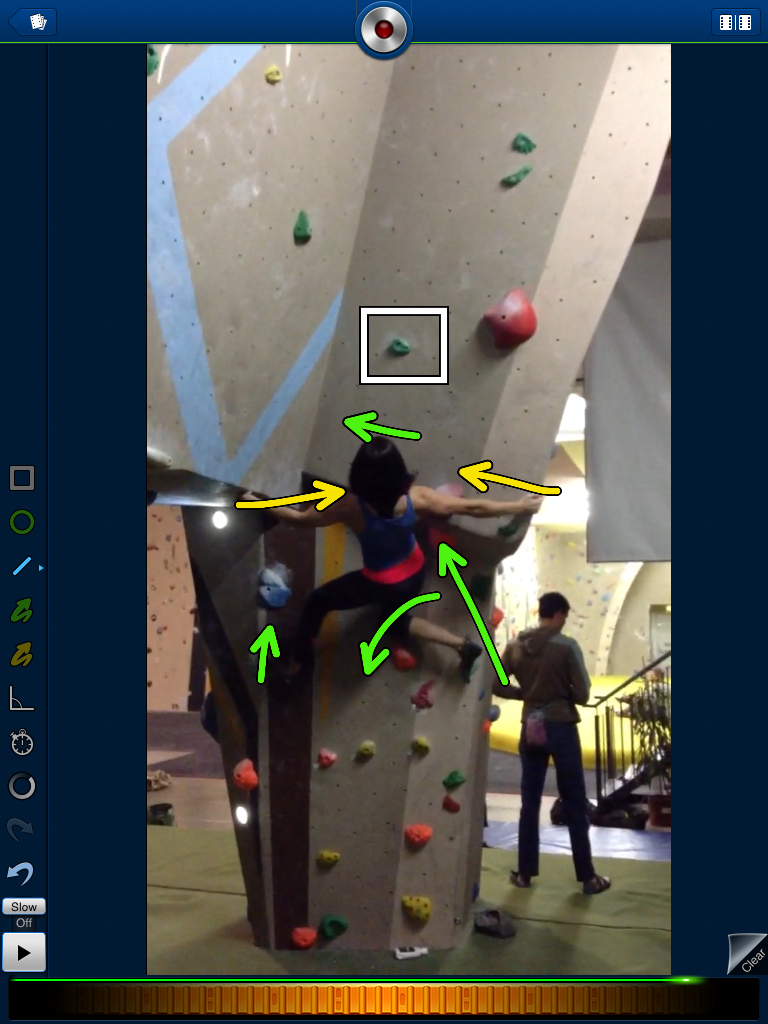
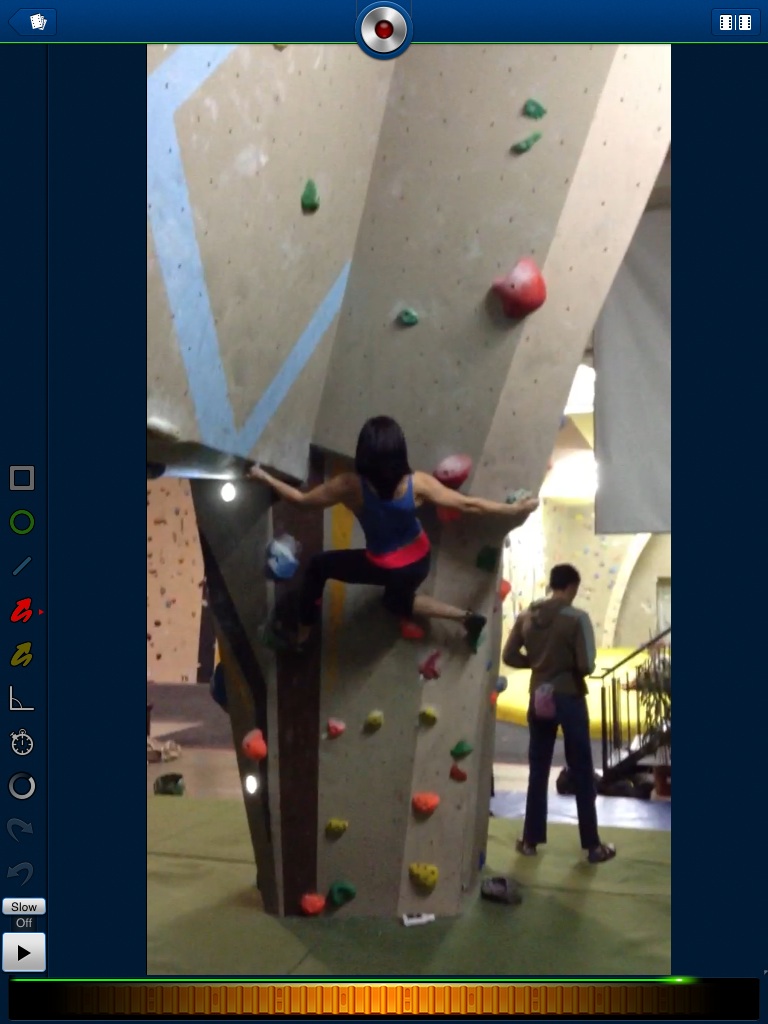
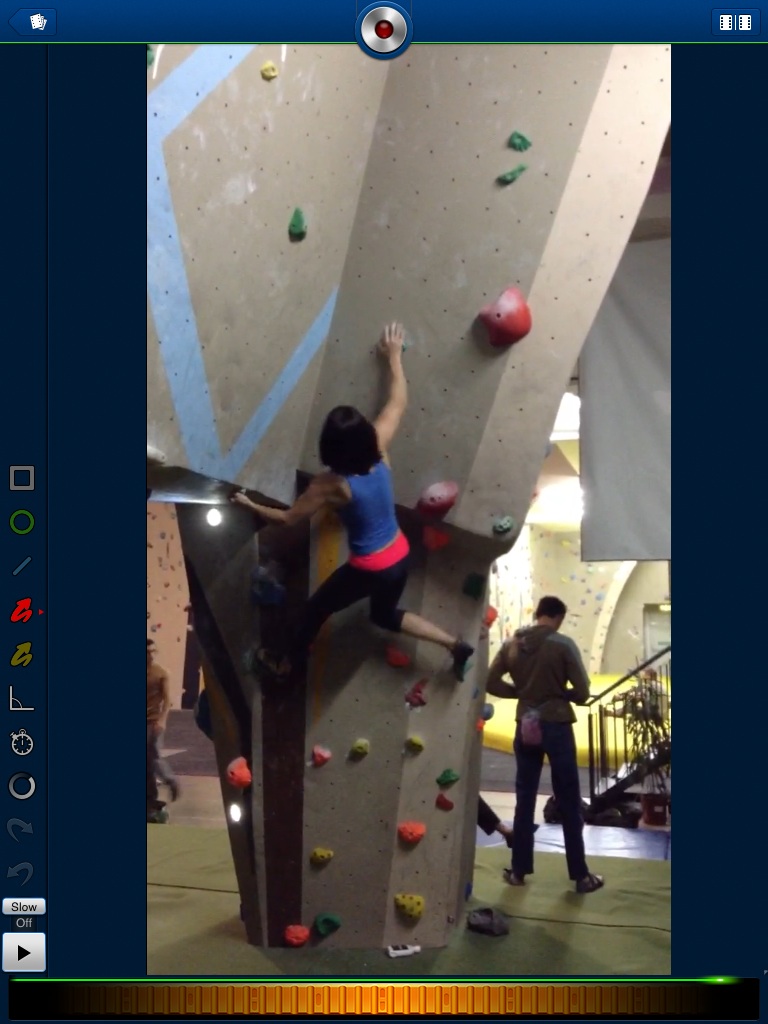
As you can see from the picture below, Coach’s Eye allows you to do far more than just watch the footage;

Watching the video footage in slow motion is always a bonus, but then the “time-line scroller” at the bottom allows the coach to slow this footage right down focusing on the real nuances of the footage.
From here, you have multiple other options. Typically seen in football replays, the arrows prove useful to show direction of drive and movement. If, for example, a climber is going for a dynamic move but driving in the wrong direction, or misfiring with arms and legs, this feature allows the coach to illustrate this to their client.
For route reading, clipping and shaking points, the app allows the coach to break down the climb using key reference points.

Coach’s Eye also allows you to share your footage online and look at videos that others’ have uploaded as well. If the climbing community take advantage of this feature, many will be able to learn from the analysis videos online. Whether it is the beta for a route/problem or the eye of a coach/another climber helping you realise why THAT move isn’t quite being completed.
From here, we can start looking at the precision pack. Now this pack costs an additional £6.99. It provides the extra features of an “Angle Tool”, a “Timer Tool” and a “Spotlight Tool”.
The spotlight tool really helps when filming with other distractions nearby – great for competition analysis. The spotlight circles the area of focus and thus gives you only one thing to view.
The angle tool can be quite effective when viewing new projects outdoors or competition walls throughout the world. If you are looking for specificity, then you can see at what angle a route/boulder is and train effectively. It can also illustrate poor body positioning and distance from rock.
Personally I believe this pack is priced too highly. I think if the precision pack matched the price of the Coach’s Eye app (£2.99) then it would be far more popular. The features do prove useful for climbing, but I am not sure if the majority would merit the cost.
Below shows some screen shots of Libby Gamble on her early attempts of a tough V7 at the White Spider Centre in Kingston. Coach’s Eye allows you to slow down the footage so much that we can see every slight adjustment before the crux move. Here, Coach’s Eye allowed us to look at the footage and break down why Libby wasn’t quite latching the hold. The arrows help highlight that although Libby was dropping her knee and pushing to gain the height, the contact with the foot was being lost, meaning that too much weight was transferred onto her hand hence she couldn’t quite hold on enough.
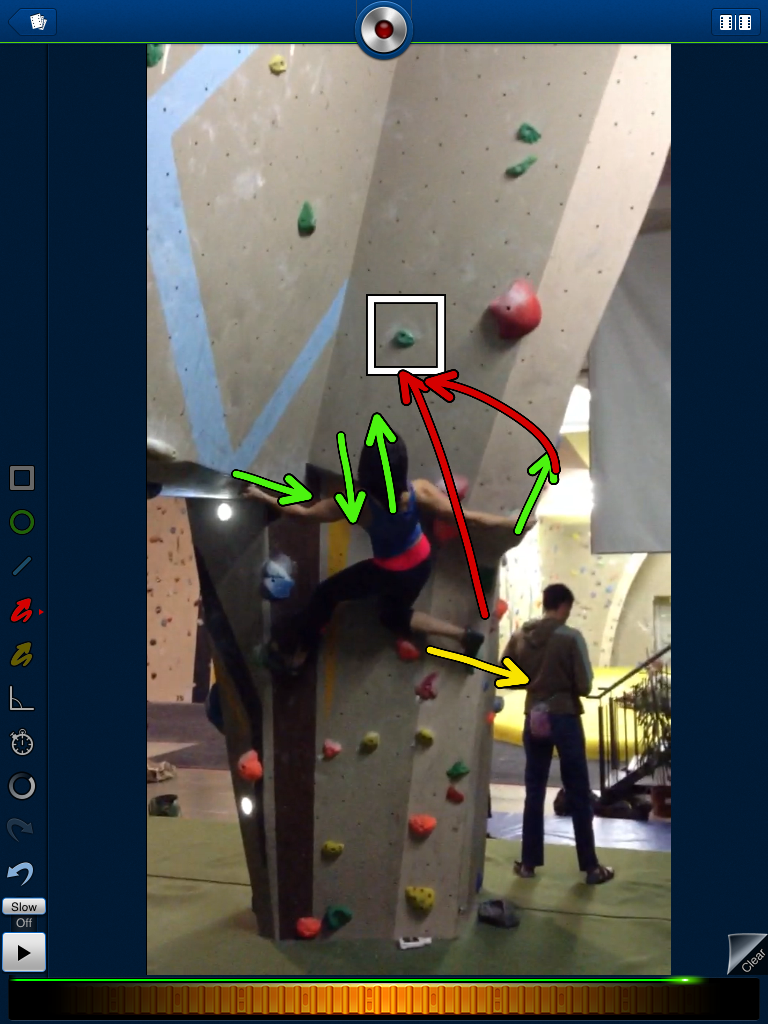
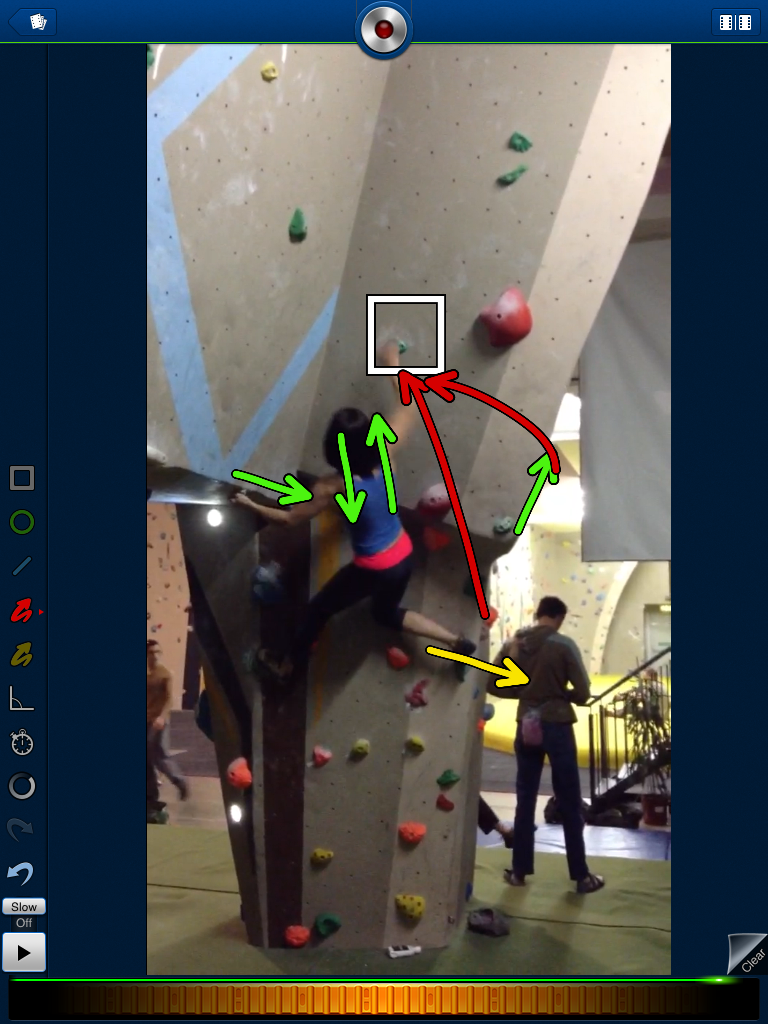
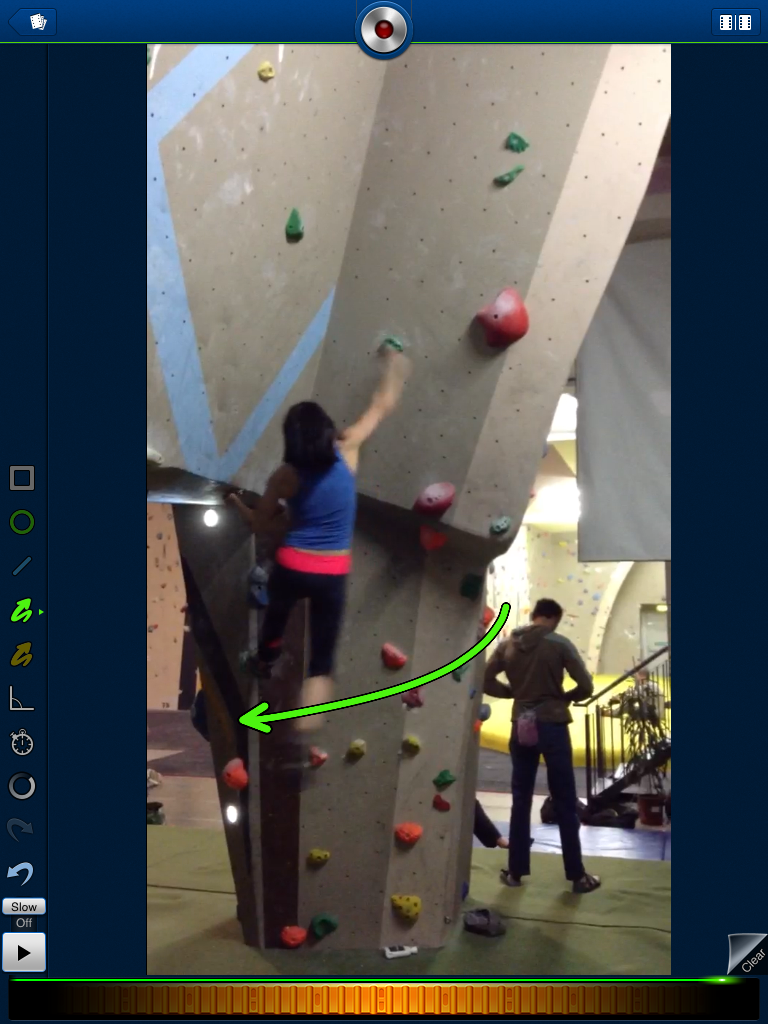
Although this example is quite easy for a coach to see, it really helps deliver the reasons and advice to the climber well.
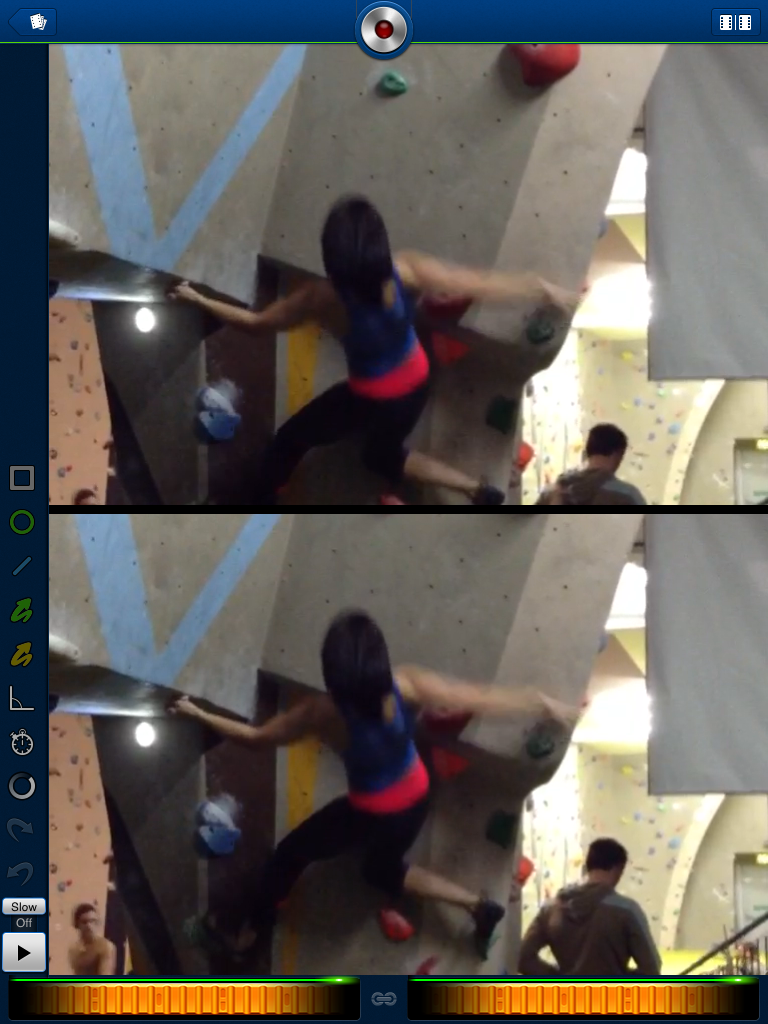
Coach’s Eye then really proves its worth when you compare videos. If you fall off at a certain point of a route and a competitor doesn’t, a direct comparison can be invaluable. Even if you are isolating moves on a route or boulder problem, this can show the true reasons behind failure and success.
A second opinion is a valuable asset in any aspect of life. When it comes to climbing and specifically training or coaching, it is gold dust. Whether you are filming yourself on your latest projects, analysing your comp performance or a coach helping others progress, I cannot recommend the Coach’s Eye enough.
It is THE video analysis tool to be used in our industry and I encourage anyone coaching or even wanting that second opinion to get it. The app only costs £2.99!
![]()
Keep an eye out for this logo and visit their website to find out more.